Are you an aspiring digital artist looking to get creative with your tablet? Procreate is the perfect platform to express your artistic vision.
With this complete guide, you’ll learn the best tips and tricks for producing stunning artwork with Procreate on your tablet!
Welcome to the world of Procreate, the powerful drawing and illustration application for the iPad. Whether you’re a professional artist or an aspiring creator, Procreate offers an impressive range of tools specifically developed for digital artwork.
In this guide, we’ll break down all that Procreate has to offer – from basic tutorials to time-saving tips – so you can make the most out of this incredibly powerful application.
Procreate allows users to draw on their iPad using various brush types such as pencils and brushes. Artists can choose from a range of customisable settings and use them in their own way to create stunning works of art. The wide variety of tools make it easy for anyone to explore creativity – from charcoal drawings to detailed illustrations – with results that rival traditional media.
Let’s get started on your journey towards mastering Procreate!

Explanation of Procreate on Tablets
Procreate on tablets is an exciting digital art app that offers users an array of creative tools and features to bring their ideas to life. Procreate on tablets is specifically designed for drawing and painting digitally, with a wide range of tools perfect for finger or stylus drawing, such as custom brushes, different color palettes, layers, blend modes and more.
The features of Procreate on tablets can be daunting at first but don’t worry – this guide will help take you through all the basics so you can become a master of digital art!
We’ll start with a brief overview of Procreate on tablets: what it is and what it’s capable of. We’ll then discuss the various tools and features offered in the app so you can get to grips with each one. After that, we’ll explore tips and tricks for using each tool effectively so you can take your creations even further! Finally, we’ll finish off with some helpful advice which should help to make your digital artwork look more professional. So let’s dive in and get started!
Importance of Procreate for Digital Artists
Procreate is the digital art software of choice for many talented digital artists who love creating on tablets. The comprehensive app has a lot to offer, giving artists the ability to paint, draw and sketch while creating stunning digital artwork. This makes it a valuable tool for any artist looking to create their own work quickly, easily and efficiently.
The Procreate app boasts a range of features that make it ideal for both beginner and advanced artists alike. Professional-level brushes allow you to craft your artwork accurately and with ease, while support for high-resolution files helps you create ultra-realistic, detailed pieces of art. You can also use Procreate’s undo/redo and exporting capabilities to export your files in various formats without compromising on the quality, or share them directly through social media for instant feedback from other creatives. Plus, its compatibility with various stylus makes it easier than ever to get creative on the go!
Overview of the Guide
This guide is intended to help digital artists of all levels become familiar with the Procreate app, how it works and the tools it has to offer. Through this guide, you’ll learn how to draw with precision and create beautiful art that is sure to impress.
By the end of this guide, you will have increased your skills in creating art and be capable of using the Procreate app for its full potential. We will cover topics such as setting up your canvas correctly, choosing the right brushes and learning about color theory applied in digital art. You’ll gain an understanding for essential tips for using an apple pencil in combination with Procreate as a drawing and painting app. In addition, advanced tricks, from cropping images to animating them are introduced which are perfect for those looking to experiment more with their artwork. Finally we’ll go over how to export photos from Procreate, so that they can be shared or printed!
Setting Up Procreate
In this section, we’ll take a look at some of the key steps you need to take in order to get Procreate up and running on your tablet. Before you can begin creating digital art, it’s important that you have a good understand of what the program offers and how to use it.
- Downloading Procreate: The first step is to download Procreate from the App Store on your device. Once the download has completed, you can open the program and begin using it.
- Adjusting Settings: After you have opened Procreate for the first time, it’s important to adjust all of the settings according to your preferences and needs. You may want to make use of certain features more than others so adjust accordingly. It’s also important to make sure that all of your brush sizes and suggested canvas sizes are suited to what you plan on doing while working with Procreate.
- Utilizing Tutorials: There are plenty of tutorials out there so use them! Utilizing tutorials can help give an understanding as how features of Procreate works in a slightly easier way than trial and error can provide you with. Following these tutorials allows for a faster progression in understanding different working aspects with this software interface for digital art creation!
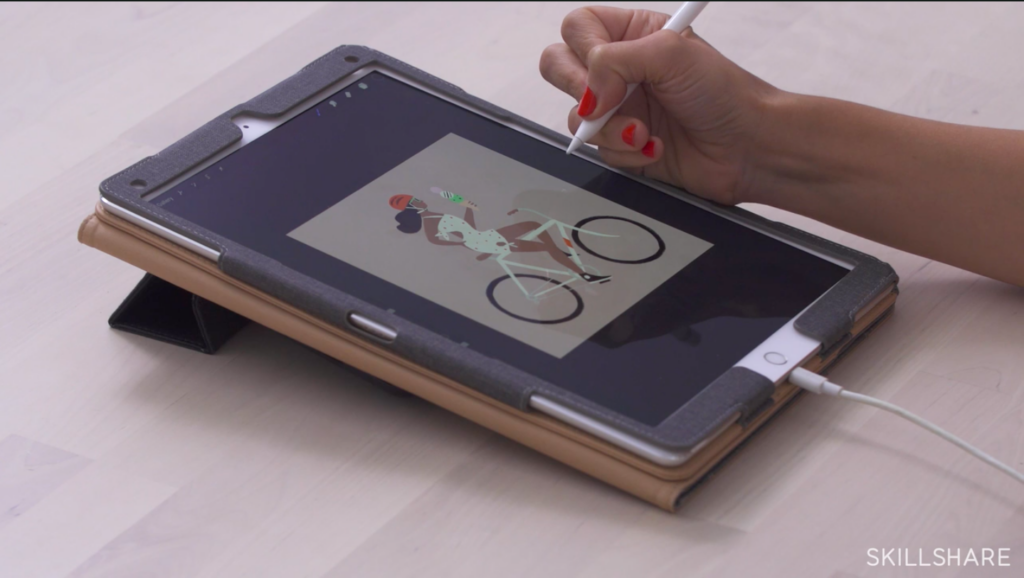
Downloading and Installing Procreate
Procreate is a powerful digital painting program available for iPads and iPhones that enables digital artists to create professional artwork with ease. To get started with this amazing program, you need to download and install it on your device. Here are the steps for downloading Procreate:
- On your device, open up the App Store and search for ‘Procreate’.
- Download the free Procreate app from the App Store onto your iPad or iPhone.
- Open Procreate on your device once it has been downloaded, and agree to their terms and conditions.
- Follow the directions in Procreate to complete installation of the program onto your device such as setting up a profile or other setup options as offered by Procreate at its launch screen (e.g., enabling ‘Assistant Factory’).
Once you have completed these steps, you can now start using Procreate! Familiarize yourself with the user interface layout of the app, so you are comfortable while creating artworks in this software suite on tablets devices!
Adjusting Settings
When you open the Procreate app on your tablet, you will be presented with a set of settings that allow you to customize how your app works. These adjustability settings provide great flexibility and allow you to create customized drawing experiences.
The Procreate settings are located in the Settings menu or placed on the side of your canvas. Depending on the type of project you are doing, there are several settings that can be adjusted. From brush size, shape and color, to canvas orientation and zoom level — the settings in Procreate can be customized to suit your own unique needs as an artist.
In this tutorial, we’ll provide a comprehensive overview of all the adjustable settings available in Procreate, from basic pencil tools and colors to advanced layer effects and animations. We’ll show you how each one can be used to boost creativity and productivity and suggest tips for getting started with Procreate for digital artists. With these tips, digital artists will gain confidence using this app’s design features to create incredible artwork in no time!
Creating a New Canvas
When beginning a new project in Procreate, the process of creating a canvas is simple and straightforward. First, tap the plus [+] symbol at the top right of the toolbar. This will open the New Canvas window where you can customize settings such as canvas width, height and scale. Select either inches or millimeters for your preferred measurement system.
In the lower left of this window is an Advanced Settings toggle – tapping this allows for more detailed changes to your canvas dimensions, resolution, orientation and background color (in addition to existing settings). Once decided upon, press on Create Canvas in any corner of the window. The newly created canvas will open up in Procreate and you’ll be ready to start creating!
Procreate Tools and Features
Procreate gives you powerful features and specialist tools to create sophisticated artwork with ease. While it is a simple app, it packs a ton of features. Below are some of the most important:
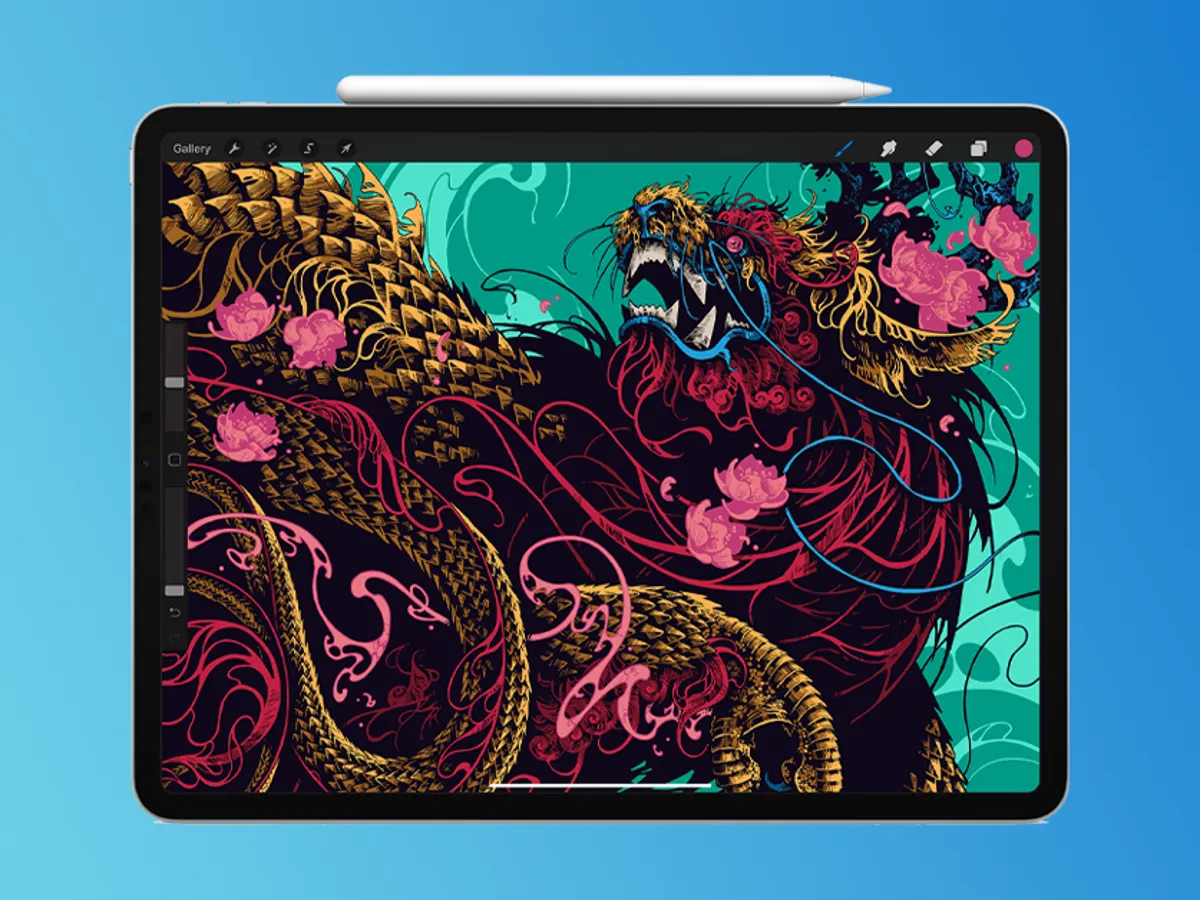
Brushes – Procreate has over 130 different adjustable brush sets, which include inks for comics and logos, pastels and chalks for drawing, sketch settings for preliminary paintings, felt tip pens and markers for line art and lettering styles, watercolors for painting-inspired artwork and more. The brushes are perfect for digital art projects that you can use to draw up beautiful sketches or illustrations.
Palettes – Procreate also has many color palettes to choose from, each designed by professional artists in their respective field. This makes finding inspiration easy as the colors are organized thoughtfully according to favorite hues or palettes in different genres such as movies or period dramas like Mad Men or historical subjects like ancient Egypt or China. You can even customize your own palettes with custom gradients or shades to create your own unique look.
Layers – The layers feature lets you easily move items around on your canvas without having to put them back together like pieces of a jigsaw puzzle. You can stack them up so that some parts remain visible while others are hidden underneath other objects which gives you more control over the order of elements on the page without having to completely redraw everything again from scratch each time something is changed on the canvas. It also allows you to experiment with different color combinations without breaking any other settings as items can be moved freely around without affecting anything else on the page.
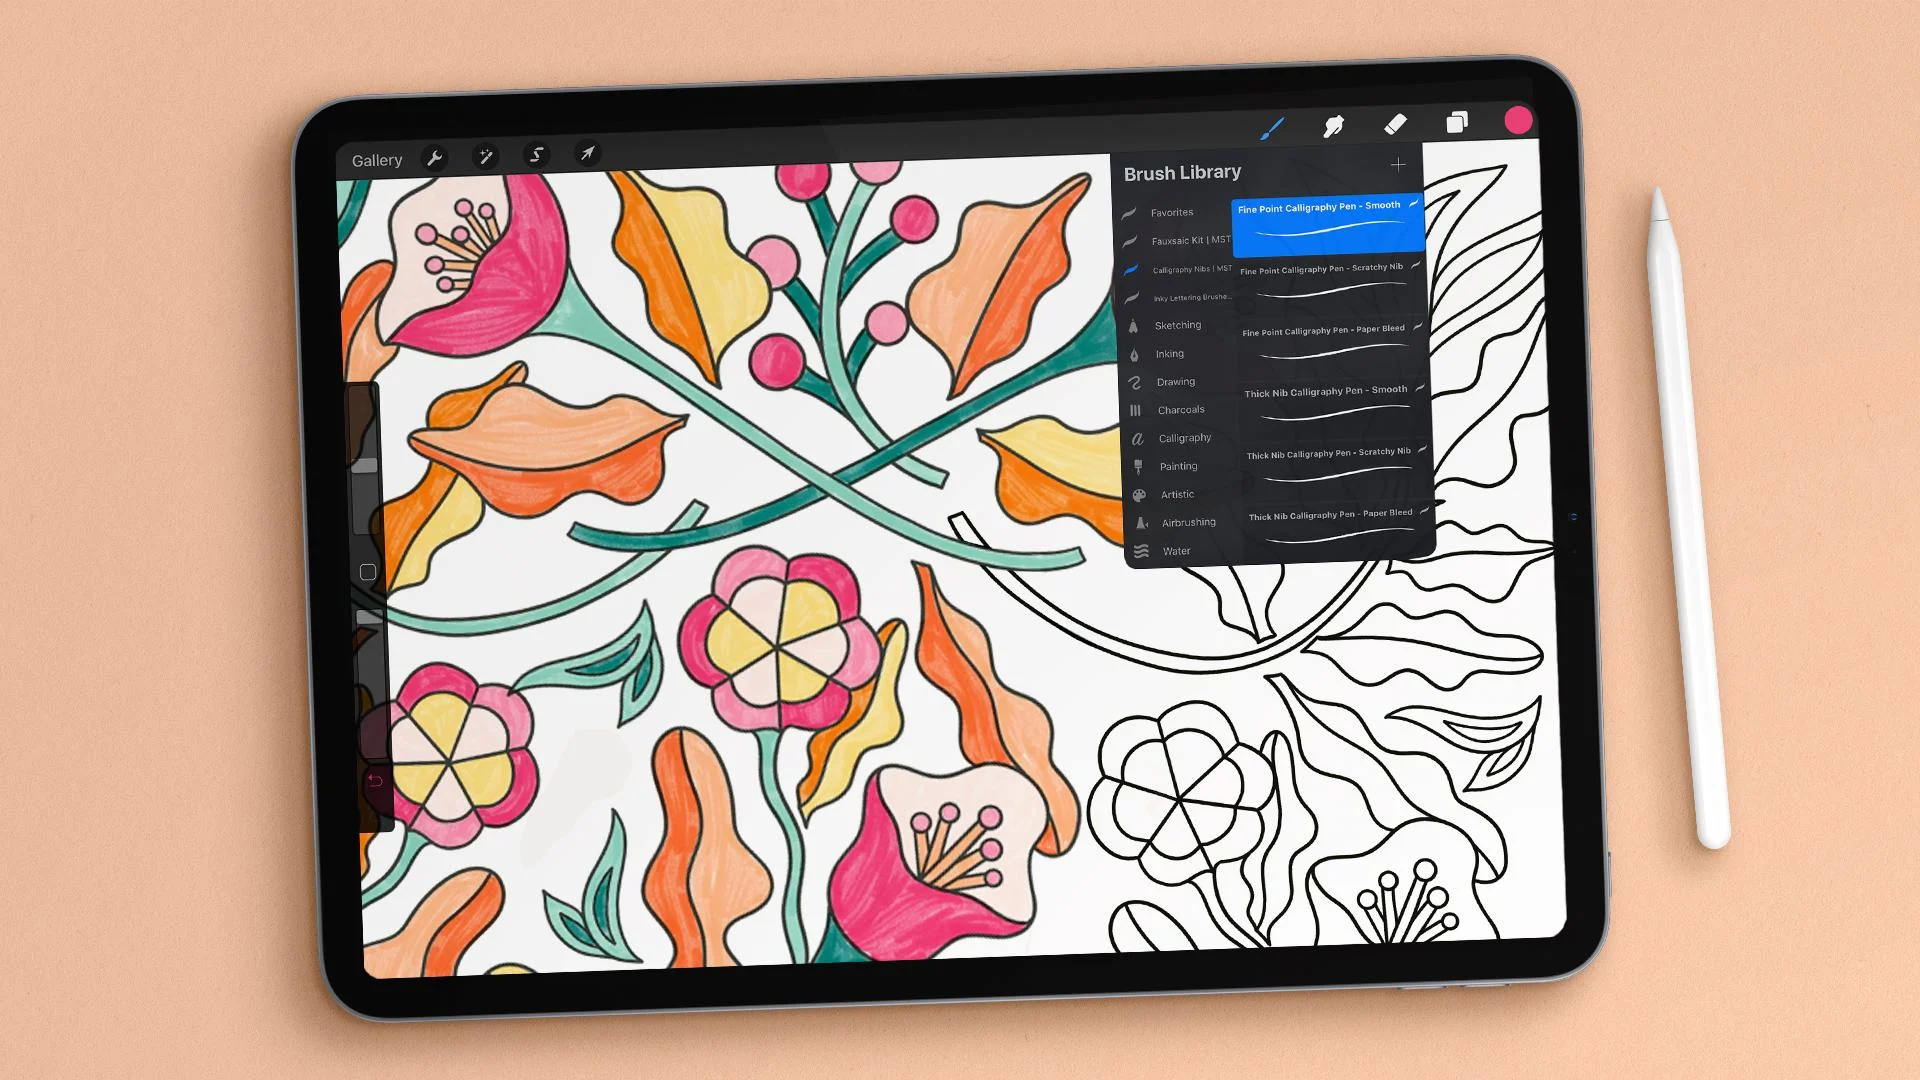
Brushes and Brush Library
One of the most important components of digital painting on a tablet is the type of brush you choose. When working in Procreate, you will find a variety of brushes available in the Brush Library. Brushes are categorized based on their texture, size, shape and opacity so you can quickly pick the one that best suits your needs. The correct brush can make a major difference in how your artwork appears as well as how it feels during the creative process.
It is helpful to understand brush terminology before selecting brushes specific to your style of painting or drawing. There are natural media brushes such as charcoal, chalk and markers as well as digital media options such as pixel spray and pattern brushes. Other brush types include airbrush, smudge, blur and eraser brushes which all have unique functions for adding effects to your work.
Choosing different textures allows for an added layer of depth that is difficult to achieve with paints or pencils alone. By combining multiple textures with various settings like opacity, size and spacing you can make intricate digital paintings with greater control than ever before! Additionally, most versions of Procreate come pre-loaded with a selection of useful brush sets that can be further modified to suit your project’s needs—giving you even more freedom in creating interesting pieces from scratch!
Layers
When working digitally, layers are an essential part of the creative process. Layers allow you to separate elements of your artwork so that they can be worked on independently and combined in whatever way looks best. They act like sheets of transparent paper, with different shapes and colors on each layer stacked on top of one another to create the picture. In Procreate, layers are used extensively when creating digital artwork.
Procreate’s layers can be accessed by swiping up and down the blank canvas or tapping the layer palette to bring it up along the right-hand side. Add a new layer by tapping the plus symbol at the top left-hand corner. Depending upon your chosen tool – whether it’s a brush tool or a type tool – shapes will automatically appear in separate layers or multiple layers will appear once complete.
By keeping individual elements of your art in their own independent layer, Procreate allows you to move them around, change size/position, and add effects with different blending modes on separate layers by swiping from left to right over each layer – allowing for unlimited control over what you create!
Color Palettes
Having the right color palette is essential when creating digital artwork on a tablet. Different colors create different feelings and emotions, and it’s important to select the right colors for your project. Before you start your artwork, start by selecting a color palette. A good rule of thumb when selecting a palette is to limit yourself to four or five main colors and two or three accent colors.
To begin creating your own custom color palette, first decide what type of feel you want for your artwork piece — calming/serene, bright/energetic, dark/intense, etc. Once you have an idea of what type of mood you want to create with your piece, look for images that captures those vibes and search for different options of palettes that would evoke those vibes.
Another way to find palettes is through searching for images via Google that are related to tones you want to capture in your work- this could include specific animals or plants, certain textures or patterns like marble etc. You can also add additional layers onto these base images using Procreate’s Layer function-such as Split Tone –to adjust each layer further in order to get the exact tone desired. Additionally, sites like Adobe Colors offer pre-made palettes as well as an easy way to create customized ones with just a few clicks! All these tips should help get you started in finding the perfect set of colors needed on Procreate!
Selection and Transformation Tools
Procreate is an incredibly powerful drawing app for digital artists. Having the right tools can take your art to the next level allowing you to create beautiful, detailed pieces. Here we’ll discuss a few of the selection and transformation tools available in Procreate and go over some tips for how to utilize them best.
Selection Tools: The selection tools in Procreate are very powerful, allowing you to select areas of your artwork quickly and accurately. The Quick Selection tool is likely the most versatile, allowing you to draw a line along any area you wish to select, while Isometric and Lasso provide more precise options that let you select specific areas of your painting. These are great if you want to make more intricate selections with an exact shape or size.
Transformation Tools: Procreate comes with several great transformation tools that can be used in tandem with one another to quickly adjust your artwork. The Scale and Warp tool lets you scale up or down certain areas of your project, while Flip and Rotate let’s you quickly rotate objects without having to redraw them. Additionally, the Shear tool gives you more fine-grained control over how objects look by letting you tilt or skew them in any direction needed.
Both selection and transformation tools can help cut down on time spent editing or tweaking small details in your artwork — giving Procreate users greater control over their pieces with fewer clicks overall! With just a few minutes of practice, any aspiring digital artist should be able to get comfortable using these helpful commands in no time!
Conclusion
At the end of the day, Procreate is one of the most powerful and versatile digital art programs out there. It’s a great choice for creating digital art on your tablet. With a few tips discussed in this guide, you’ll be able to create amazing pieces of artwork in no time.
You can use different tools and techniques to enhance your work and make sure that you get the best results every time. Experiment with different effects, textures, and brushes to ensure that you’re getting the most out of your tablet’s capabilities when it comes to making digital art. Whether you’re an experienced artist looking to expand your skills or a beginner just starting out – Procreate has something for everyone!
FAQ’s
Is Procreate good for digital artists?
Yes, Procreate is considered a highly versatile and powerful digital art software specifically designed for artists, with a wide range of features and tools to create and manipulate digital art.
What are some tips for Procreate?
Some tips for using Procreate include using layers to organize your work, experimenting with different brushes, utilizing the color and opacity tools, and taking advantage of the various transform and selection options available.
What is the best Procreate setting for sketching?
The best Procreate setting for sketching depends on personal preferences, but some recommended settings include using a pencil brush with low opacity and pressure sensitivity, adjusting the canvas size to fit your needs, and enabling the streamline feature to help create smooth lines.
How do I make Procreate art high quality?
To make Procreate art high quality, it’s important to use a high-resolution canvas size, avoid excessive zooming or resizing, use high-quality brushes and textures, and export your work at a suitable file format and resolution.
What is the best Procreate color profile for digital art?
The best Procreate color profile for digital art may depend on the specific project or purpose, but sRGB is a commonly recommended color profile for digital art as it is widely supported and produces consistent colors across devices.
What is the highest quality Procreate image?
The highest quality Procreate image will depend on the resolution and file format chosen when exporting the image. Procreate supports exporting images in a variety of file formats including PNG, JPEG, PSD, and TIFF, each with different levels of quality and compatibility.
What image type is best for digital art?
The best image type for digital art will depend on the specific needs and requirements of the project, but commonly used image types for digital art include PNG, JPEG, and TIFF, which offer varying levels of quality, compression, and compatibility.
Is JPEG or PNG better for Procreate drawings?
The choice between JPEG or PNG for Procreate drawings will depend on the specific needs and requirements of the project. PNG generally offers higher quality and supports transparent backgrounds, while JPEG is more commonly used for compressed images and can result in smaller file sizes.
Why is Procreate blurry when I save?
Procreate may appear blurry when saved if the canvas size or export settings are not set to a high enough resolution. To ensure a clear and sharp image, set the canvas size to a suitable resolution and export the image in a high-quality file format.
How do I sharpen an image in Procreate?
To sharpen an image in Procreate, select the Layer menu and choose the Sharpen filter. Adjust the amount of sharpening as needed, and use the layer mask tool to selectively sharpen specific areas of the image.
See Also:
- Best lenovo tablet 2023
- Best tablet for sheet music 2023
- Best osu tablet 2023
- Best standalone drawing tablet 2023
- Best tablet for teenagers 2023

